


Introduction
What is Express?
Express is a framework of Node.js, which means it is used to handle the backend of a web application, but it has more features than Node.js as it is built on top of it. eg:- Express offers plugins, template code, middleware tools, and routing capabilities for streamlined web creation or we can even integrate tools and features from third parties.
What is Rest API?
REST API(Representational State Transfer) is a way of accessing web services simply and flexibly without any processing, meaning a stateless transaction, where there are no states involved in giving back the information.
It is used to fetch or give some information from a web service. All communication done via REST API uses only HTTP requests.
What are we building today?
We are trying to create a to-do list using express.js.
add the HTML to the page using express- handlebars which is a templating engine
Create the Rest APIs for - adding, deleting, and reading the todos from a JSON file.
Let's start with our project now.
Create an empty folder, say todo-app, and install the necessary dependencies.
Install dependencies
npm init - can be used to set up a new npm package.
express-handlebars - handlebars are used to create a reusable template consisting of HTML, texts and expression.
body-parser - it is used to parse the incoming request body before the handlers.
nodemon - it automatically restarts the nod.js server, whenever it detects any changes in the directory.
npm init -y
npm install express
npm install express-handlebars
npm install body-parser
npm i -D nodemon
configure the nodemon in package.json
"scripts": {
    "start": "nodemon index.js"
  },
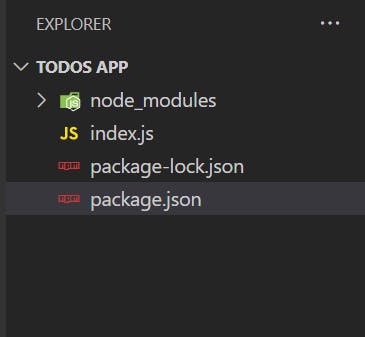
And we are ready to start our project. I hope the project folder structure is looking something like this.
Start the server
Start the server by importing express.js and making a get request to the server.
const express = require('express')
const app=express()
const portNo = 8080
app.get('/',(req,res)=>res.send('Hey there, on the server'))
.listen(portNo,()=>console.log(`server running on port : http://localhost:${portNo}`))
Now, when we open our localhost or go to http://localhost:8080/ we should see the response as Hey there, on the server.
Add HTML Template for the todo app
Templating engine
Templating engines are used to create reusable pieces of HTML code even before React came into the picture.
When we build a server-side application with a template engine, the template engine replaces the variables in a template file with actual values and displays all those values to the client.
It takes some files and gives back a plain HTML file after replacing the variables with the values. This makes it easier to quickly build our application.
Over here, we are using express-handlebars.
Different parts of handlebars include:-
Layouts - used to set the general layout of the page.
Pages - are templates for the same kind of page. eg:- home page and all the product pages will have a different type of template, so the pages will have a definition of that.
Partials - are shared code between pages, such as navigation.
Context - content that is passed to templates and results in being the page's content
Helpers - allows us to display or omit content based on conditionals such as if statements. For example: showing the cart page only if a user is logged in.
Setting up the express-handlebars
Require handlebars
const {engine} =require('express-handlebars')
Configure Express to use handlebars as the view engine
app.engine('handlebars',engine())
app.set("view engine","handlebars")
We have set the value of the view engine through the handlebars. So that, handlebars will start working as our default engine. Now, all the upcoming routes in the control flow will start using handlebars as their default engine for setting the HTML page.
Express assumes by default that we will store our views in the view folder. But we can change it as well using the layoutsDir and partialsDir. But this is completely optional. I'm not doing it
app.engine( 'handlebars', engine( {
    extname: 'hbs',
    defaultView: 'default',
    layoutsDir: __dirname + '/views/pages/',
    partialsDir: __dirname + '/views/partials/'
  }));
Instead, we can add a view folder to write a home page, product page or any other page with the file name home.handlebars, products.handlebars etc.
The folder structure of views should look something like this. Important point: it is necessary to define the layout of the page.

inside main.handlebars we just have to define the layout of the page -> which is internally defined in the body of home.handlebars page.
main.handlebars
{{{body}}}
home.handlebars
<!DOCTYPE html>
<html lang="en">
<head>
    <title>Document</title>
</head>
<body>
    <h1>To do app</h1>
</body>
</html>
To render the home page from the app, add the below line to the index.js
app.get('/',(req,res)=>res.render('home'))
Now, the render function will look into the views folder for the home.handlebars file and display the content of the home template on the screen.
Let's get into Rest APIs now.
Creating rest APIs for the todo app
We'll be building API for three requests - get, post and delete
POST - Add new todos to the JSON file
GET- Get all the todo from the JSON file
DELETE - Delete a specific todo from the list of todos
Add new todos using Post request
import an empty JSON array. Directory './data/todosData.json' has an empty array -> []
const todoData=require('./data/todosData.json')set the body-parser to get the data from the request body.
  const bodyParser = require('body-parser')
  app.use(bodyParser.json())
add
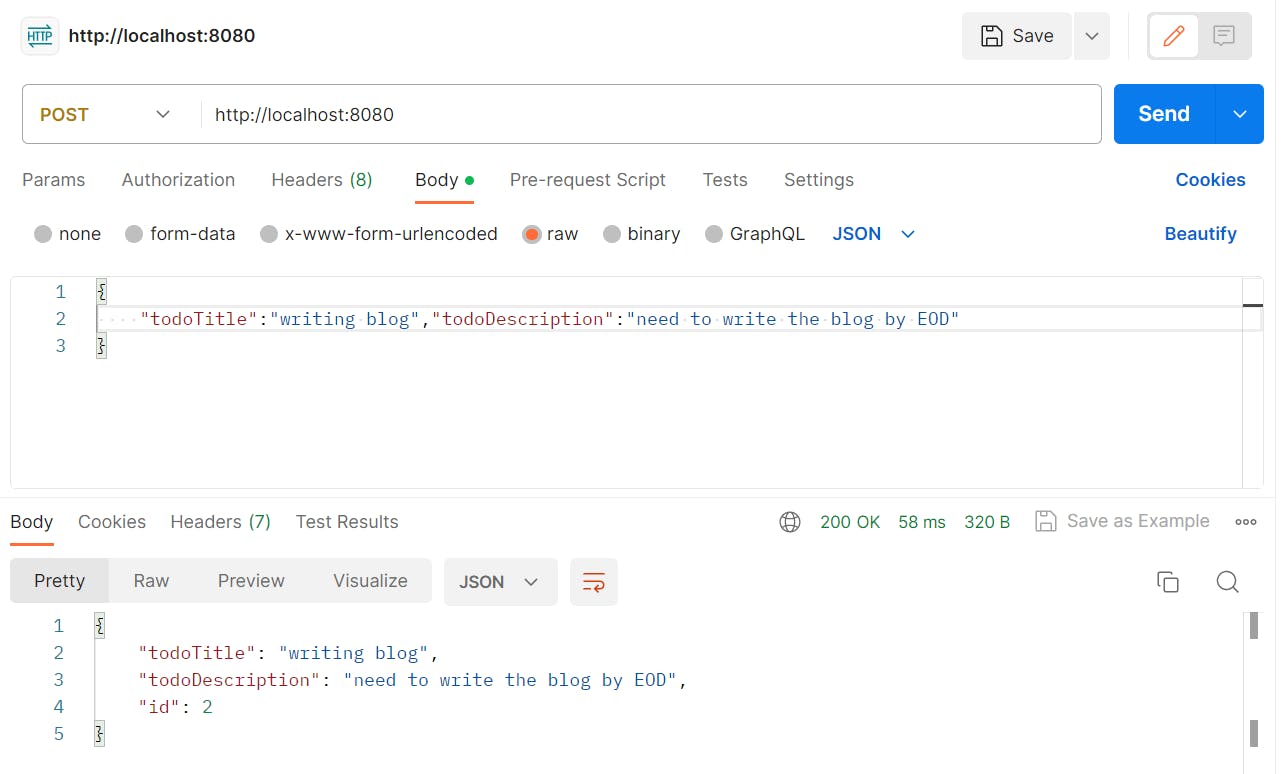
fsto interact with the file system of our computer(which is JSON in this case).const fs=require('fs')The logic for adding new todos:- We are taking the todoTitle and todoDescription from the request body of either Postman (or from the web page), followed by pushing the newly created todo item to the todoData as well as the JSON file.
  //adding new todo
  app.post('/',(req,res)=>{
      const {todoTitle, todoDescription}= req.body
      //if required field are not present in the body
      if(!todoTitle){res.send('missing required fields')}
      else{
          const newTodo={todoTitle,todoDescription, id:todoData.length+1}
          todoData.push(newTodo)
          fs.writeFileSync('./data/todosData.json', JSON.stringify(todoData))
          res.redirect('/')
      }
  })
Checking the post request on Postman
Updating the page template to add new todo from the web page itself. This form takes the post method along with the action URL '/'. Also, the name property of the input tag should be the same as the array props of todo.
  <form action="/" method="post">
          <input type="text" name="todoTitle" placeholder="todo title">
          <input type="text" name="todoDescription" placeholder="todo description">
          <button type="submit">Add todo</button>
  </form>
Middleware is responsible for parsing the form data and making it accessible in the req.body
app.use(express.urlencoded({ extended: false }))Add the HTML for displaying the content from the JSON file
  <div >
         {{#each activities}}
              <div >
                  <h4>{{this.todoTitle}}</h4>
                  <p>{{this.todoDescription}}</p>
              </div>
          {{/each}}
      </div>
To display the activities, we need to render the get request along with the
activitiesvariable so that the template engine converts the variables into values.app.get('/',(req,res)=>res.render('home', {activities:todoData}))
Get the todos from JSON file
app.get('/',(req,res)=>res.render('home', {activities:todoData}))
Delete todos using the Delete request
Before we proceed further, let's understand one major concept about HTML forms. They can accept only 2 methods: Get and Post.
<form method="get|post">
To work with delete requests, we need to override the method. :-
npm install method-override
const methodOverride = require('method-override');

app.use(methodOverride('_method'));
in the HTML template, we can provide the form's method as post.
<form method="post" action="/{{this.id}}?_method=DELETE" >
     <input type="hidden" name="_method" value="DELETE">
     <button type="submit">Delete</button>
</form>
In the delete request, we are just trying to find the index of the to-do item which needs to be deleted and remove that element from the todoData.
app.use(methodOverride('_method'));
app.delete('/:id',(req,res)=>{
    const requiredTodoId=req.params.id
    const findTodoIndex=todoData.findIndex(eachTodo=> eachTodo.id===parseInt(requiredTodoId))
    if(findTodoIndex!== -1){
        todoData.splice(findTodoIndex,1)
        fs.writeFileSync('./data/todosData.json', JSON.stringify(todoData))
    }
    res.redirect('/')

})
Link for the working github code:- https://github.com/kumsomi/todo-app/
Summary
We have learnt about express.js and Rest API.
Creating simple APIs for the HTTP requests.
I hope you had a good time reading the article.
- If you have something to discuss Or Want to continue this discussion? Or have any feedback for me? Write down in the comments below.
- Let's connect on Twitter, or write to me at kumsomi.5@gmail.com.
Thanks for reading.
Until next time, take care, keep Reading and keep spreading happiness.